Showing posts with label anti aging. Show all posts

Tuesday, October 22, 2013

Perricone Blue Plasma for a non-irritating face peel

Given our skin is the largest organ of the body, when it's not at its best, the first signs of that will often surface on our skin. Which is why we sometimes have bad skin week. It generally comes around whenever we are run-down, didn't get enough/proper rest or are just plain stressed.

That's been happening to me of late. Aside from the hormonal break outs on my chin, my skin just looks a bit sallow and dry, lacks vitality and is very reactive with any strong product (which my skin normal tolerates well) causing sensitivity, redness, and additional break outs on my cheeks and around the temple area.

So in search of something that can help clear my skin whilst I de-stress my body and mind, I found it in a blue bottle of liquid from Dr. Perricone which promises to give me smooth soft radiant skin without causing inflammation, abrasions or micro-scarring, irritation or redness, photo-sensitivity or requiring any down time.


Perricone MD Blue Plasma


Blue Plasmas seeks to increase the skin's natural renewal produce by increasing the rate of cell turnover - this sounds pretty much like a exfoliator, yet it isn't one. It appears to act like a peel and it isn't that either, not in the traditional sense anyway.

Here is an excerpt from the official marketing of this quirky product:
A non-acidic daily peel for brightness and radiance. The revolutionary technology of Blue Plasma reinvents the action of more traditional peels or exfoliators. It bio-specifically peels only dead skin cells, micro-purifies the pores and hydro-fuses the skin with nutrient rich water.
Slightly sticky with a faint but unremarkable scent, this blue (it's blue because of the dye but it's supposed to replicate the blue of the copper gluconate in the product) fluid  is meant to be used after on cleansed skin once a day (either morning or evening is fine).You apply the product into skin (I dispense a dropper for each side of the face and another one for the forehead and nose, chin area) and use the patting motion to pressed it into skin until it's absorbed before continuing with your regular skincare routine of serums and/or moisturisers.

The first thing I notice is that skin is immediately re-hyrdated thanks the the hyaluronic acid and aloe combination. It's other key ingredients list is also impressive - the enzymes in the hydrolised salmon egg roe attacks only the dead skin cells on the surface level to help gently speed up the shedding of skin. The amino acid L-carnitine unclogs congested skin and bring to surface impurities within skin, magnolia bark extract to sooth irritations, copper ions to promote skin cell healing and  ptersostilbene provide anti-oxidant functions to give skin radiance and clarity.
look how dry my skin is lately - immediate hydration after applying just one dropper of Blue Plasma
When using Blue Plasma, the irritations and flare ups on my skin often will die down within 15 minutes after application, which makes it great for those for sensitive skin who normally wouldn't consider any peel products as those can be too harsh on sensitised or reactive skin. Other than that, I don't really notice anything different in this product than any other serums.

I didn't experience any flaking skin with its use, yet it looked like I have renewed skin after 4 days' use. I notice that my skin tone is clearer - the sallowness has disappeared. In fact, Blue Plasma helped to rid me of flakes around my blemishes that were being dried up by acne creams and accelerating the healing of the blemishes. My skin is now calmed down and smoother again.

After 2.5 weeks of almost daily use, I am more than impressed by its ability to speed up healing of minor blemishes, and ability to gently exfoliate skin without any irritation and causing further flaking during the process. The fact that it doesn't cause photo-sensivity like many other 'peel' products is a winner as we head towards the summer months.

My skin is now softer, smoother, clearer and more even in tone. I can't say that the result is entirely from using this product alone as I use other skincare products on top of Blue Plasma and also use a cleansing brush (Clarisonic) to wash my face, but I definitely see that without it's addition, the results just isn't as efficient and I don't get the clear skin as quickly as I do with its use.

Blue Plasma is really a mini facial in a bottle and the new generation of home face peels; you don't need to go to salons to get the coveted radiant clear skin if you have this bottle in your beauty cabinet. And best of all, it is effect for all skin types so anyone can use it for clear and bright skin. The only downside is that once you've discovered it, you may become addicted like I am and fear you will run out of it.

Perricone MD Blue Plasma RRP A$130 for a 59ml dropper bottle at Mecca Maxima stores and Cosmetica online in Australia. Internationals can try their Sephora stores.

This product was provided for editorial consideration. 

Monday, February 25, 2013

Getting Clear and Brilliant Skin


This post is a long time in coming - in fact, it should have been published last year had I not been sidetracked. But as they say, it’s better late than never right? Well then, let’s get straight to it.

Who doesn't want clear and vibrant looking skin?
Sometimes, no matter what you do, you skin just looks dull and tired. Whether it be diet, lack of sleep or exercise, you just haven't got the routine right to having you looking fresh again.

Normally you might hit the salon and get a face peel or microdermabrasion but if you want something extra that continues to deliver benefits for months after, then you need to look into new treatments delivered by laser technology.

Now I know that when people think about laser treatments, they conjure up images of traditional laser treatments that is pretty strong and powerful. It is also associated with the need to take time off from normal activities, press the pause buttons for a few days before they can resume normalcy and regular routine again.

With improvements to technology, you can now get the benefits of laser but in a more gentle manner, without all the typical associated discomfort and inconvenience.

Always keen to experience and learn more, I had the opportunity to try this technology last year at Melbournian clinic Erase Aesthetic Services.

Clear + Brilliant laser  (C+B) - what is it?

Clear + Brilliant is like a souped up facial – it’s based on fraxel laser (so uses fractional lasers) technology to help prevent the early signs of ageing and can work as a skincare maintenance regimen. It uses a diode laser that gives out a 1440 nm wavelength and a 140 μm spot size to create micro-injuries that only reach the skin’s top layer (stratum corneum) to rejuvenate it.

C + B is suited to those in their 20s and early 30s who want to subtly refresh their looks (read: radiant clear skin) and don’t want to resort to drastic measures. It can also helps with improving pore sizes and temporarily reduces sebum production so is great for anyone with oily skin. In short, if you don’t have major skin conditions but want to refresh (rather than rejuvenate which in most people’s mind is a more dramatic improvement), then C+B would be suitable for you.

Why did I want it?
My skin was just looking dull and tired with my perpetual lack of sleep and stressful work. I also had very oily skin and as a result, very enlarged pores on my nose and cheeks.  I wanted to give C+B a go to get the glowing skin look that lasts longer than just a day or 2. I was also hoping that it would help with clearing minor breakouts I had around my T-zone area.

The procedure
As far as procedure goes, this is one of the simplest ones I’ve had, it was literally like going to a salon for a facial. There wasn’t much pre-treatment measures to observe, other than to stay out of the sun (or wear sunscreen – which we all should be doing anyway) so skin isn't over exposured or burnt.
I dropped in to the good people at Erase Aesthetic Services in the morning and after filling in a new client form (including what my current skincare regime and products I was using was) with the clinic, Maria, my dermal therapist proceeded to assesses my skin type and condition. She decided that we would use the high setting (the machine has 3 settings giving out different energy levels during the treatment to suit all skin types) as most clients tolerate the high setting well and it would help with my oily skin.

After the assessment, I was given a quick cleanse to remove any dirt and makeup from my face using the gentle Jan Marini cleanser and then as a comfort measure, she applied a topical aneasthic cream on my whole face so that during treatment, I wouldn’t feel the laser on my skin.

20 minutes later, my face was feeling slightly numb and the bit of cream that got onto my lips made me feel like I was about to drool off the side of my face - a good indication  I was ready for the treatment.

The actual treatment:
Lying down on the treatment chair, Maria, used the C+B device with a one use only laser tip to shoot a beam of light onto my skin.  As an additional comfort, there was a cooling fan called a Zimmer which was blowing jets of cool air on the area where my skin was being treated, making it very pleasant and completely pain free.  During the treatment I felt a slight prickly sensation and my skin warm up but the zimmer cooler was doing its job so well, I wasn’t bothered by it.
Clear + Brilliant device used to zap my skin
In total, the area of the face had 8 pasess over the same surface – 4 horizontally and 4 vertically to ensure that any area missed in the previous pass is picked up.

After about 10 minutes, my treatment was complete and my skin was allowed to cool down some more
skin immediately after Clear + Brilliant treatment: looking red
Straight after treatment, my skin was warm and red in patches of the face and sensitive to touch as if I’ve stayed out in the sun for too long but it didn’t hurt or sting.  I popped on some sunscreen before leaving the clinic and headed home to rest up.

I was also provided some post care advice and after care products from Jan Marini to use before being sent home.

C+B post-treatment care
  • Use gentle cleansing products and not to use exfoliating agents (chemical or physical) for the first 3 days. Scrubs are an absolute no-no!
  • Skin will dry up and so application of topical hydration is essential to help with adding the moisture and helping with the skin recover.  Peptide serums like the Jan Marini Peptide Extreme serum is great for this as it regulates the skin’s inflammatory response. I used this quite liberally on the first few days 2 and even 3 times a day in the first 2 days.
  • Skin experienced dryness and dry flakes started appearing in 3 days. On the 4th day, I could use to ezyme mask to help remove some of the top layer dead-skin cells.
  • Avoid perfume, chlorine, UV, products that contain resurfacing ingredients, and hot water.  Also little note: waxing, hair dying should be avoided.
Recovery & Results
Day 0:
Even though there isn’t supposed to be any down time, I did notice on the that my face started swelling a fair bit afterwards but died down the next day. This is to be expected since I just had my face lasered and therefore I would not recommend this as a lunch time treatment as you can look quite bloated afterwards! My forehead stung a fair bit and I decided to lye down for the bulk of the afternoon and stayed indoors the whole day.
Slightly swollen and sun-burnt looking
Day 1:
The swelling is gone but  I noticed some dark tiny blood dots on the side of my face. I was told these were micro internal bleeding in the skin from the skin injury cause by the laser will fall/wash off with the dead skin in a few days time when new skin grows. Skin was starting to feel dry and I was slapping on the peptide serum like it was water to a desert. Skin wasn’t painful to touch and I was able to go about my normal routine with a slightly heavier than usual makeup application to hide those blood dots.

Day 2 & 3:
Skin was starting to feel and look rough with the dry flakes occurring. The blood dots were deepening more in colour and looking like micro scabs dots now. Thankfully nothing that makeup couldn’t fix either – even though it gets tricky around the area with dry patches.  Towards the end of day 3, I I was able to gently sloth away the flaky skin in the evening during my cleaning routine just by gently rubbing my skin.

Day 5:
My skin is a lot more clearer now that all the top layer of dead skin has been taken off. Actually, it’s quite glowy with a inner radiance and plumpness that you get with new skin. Skin definitely feels and looks reborned. The texture is also refined and soft.  I continue with using the peptide serum but have included a vitamin c serum in an attempt to improve my pigmentation spots.

Week 2:
Skin is still looking great – it's radiant and skintone is very even but what I’m most estatic about is that it seems C + B has also improved the appearances of my shallow scar marks on my cheeks. They definitely look less pronounced and my skin is more even.
before C + B treatment

at week 2 - naked skin with moisturiser only
The recommended number of treatments to start off with is 3, each at 1 month intervals (to coincide with the skin cell life cycle perhaps?) and after that, quarterly sessions for maintenance purposes.

before C + B treatment

at week 2 - naked skin with moisturiser only

At $300 each treatment (pricing correct as at September 2012), this is not a cheap course. But the results on my skin are by far better than any facial or microdermabrasion treatments I’ve had so I guess it delivered more value for me.  I would likely get a laser treatment on a quarterly basis to maintain and improve my skin texture.

I've enjoyed my Clear + Brilliant treatment and have the wonderful staff at Erase to thank for the complimentary service. It's made me realised that laser doesn't have to be painful to get good results.  I'm now a firm believer that laser is the future of beautiful clear skin.


Thursday, August 2, 2012

The Ultimate Skincare: Estee Lauder Re-Nutriv Re-Creation Face Serum & Cream

Whenever I think of expensive high-end skincare, my mind normally conjures up jars from La Mer, La Prairie Sisley, and Naturra Bisse.

But this year, another brand has entered into the league of the thousand dollar cream market. This time, its maker is none other than Estee Lauder with its own top of the range skincare line. 

Estee Lauder Re-Nutriv Re-creation Face Serum and Cream Set
Launched earlier this year (March) in the American market and making its way over to our shores in mid-April, this has got to be one of the most expensive cream of the year. The range consist of a Face cream and Night Serum duo (A$1350 for the set) and an eye balm and night serum for eyes duo(A$550).

What it Claims (edited for conciseness): 
A 24-hour anti-ageing skin care system capable of unleashing your skin's natural power to reveal skin that appears firmer, more luminous and younger thanks to a winning combination of scientific excellence, ancient wisdom and the ocean." An elixir of nourishing extract and cushion and comfort skin. It includes a selection of highly refined precious oils and lips from plants and naturally derived ingredients to infuse skin with the extra rich, vital hydration at night and precious oils provide skin with incomparable smoothness, radiance and silky comfort for a sensuous pampering experience. Skin feels more supple replenished and luxuriously comforted and receives the most exceptional care and looks more youthful than ever.

Breaking it down, it sounds like this cream and serum set delivers exceptional smoothing properties and helps with delaying the signs of ageing whilst giving you a pleasant experience at the same time. Fortunately, I got to find out first hand what exactly it can do for my skin as I was given the opportunity the try this duo over the past couple of months.

As you would expect of a high-end product, the packaging is instantaneously captivating - elegant, luxurious, extravagent and in all honesty, looked like it has a glowing halo with its dark clear acrylic casing within a gold bottle and jar, and gold trim and lids.

Let’s look at the key ingredients that it contains (as this was a sample and not the retail product, I unfortunately don't have the full ingredients listing to share with you).

The Face Serum
The night serum is a wonderful blend of light oil that skin readily drinks up. It contains

  • Karanja or Honge Oil (which is cold pressed from the seed of a native tree of India), used in traditional Ayurvedic medicine for its healing antiseptic, anti-inflammatory properties, high in essential fatty acids that provides excellent anti-aging benefits.
  • Evening primrose oil which is again a fabulous oil that sinks into skin quickly to nourish and hydrate with its high concentration of gamma linolenic acids to renew skin. 
  • Padina, an extract from the brown algae from the Mediterranean which purports to help the calcium in skin protect cells to help with prevent the premature ageing and death of cells. 
The Face Cream
The velvety luxe and light emollient face cream that can be used day or night contains
  • An in-house patented protein known as Glacial BioExtract (phormidium persicinum) is extracted in the pristine Antatctic ocean that has properties to help boost skin elastin production as well as provide perfect hydration. 
  • Algae extract provides skin repair properties to renew and protect. 
  • Amino acid EGT and laminaria digitata extract (aka silketare) derived from a sea plant help to provide energy to skin cells to support its healthy function.
How did it perform
I’m not going to lie, I love this face cream and serum duo. It glides on like a dream and I only use the tiniest amount (trying to make my precious set last as long as possible).

At night I dispense about 3 drops to use on my entire face (one of each cheek and third on the forehead)and follow up with 3 tiny smears of the cream onto the same area.

It provides the perfect amount of hydration and despite the serum being oil based, gives my face a matte finish without that shine you normally associate with using oil based products. It's like a soft focus lens has been cast on the skin to give it that silky smooth texture.

The cream is light, silky and absorbs into skin quickly without any residue or feeling of greasiness.

Scent wise, both products has a beautiful and delicate creamy green floral blend that is made up of lotus, hyacinth, cyclamen and orchids blended with tiger lilies and warm woody sandalwood to create to sensual experience. I normally don’t like too much scent in my face products but this cream and serum is not overpowering and doesn't irritate skin (even on broken skin) so I make an exception to this.

I actually love the scent so much that I would probably buy the bottle of the fragrance if they made it available.

The next morning after using, skin is amazingly smooth – it literally gets transformed to the realms baby’s bum smoothness. And no matter how bad the texture my skin was the day before, the transformation the next day is incredible with more refine and smoother texture. To get this sort of change with a single use is incredible as it normally takes at least a week or more for other products to achieve.

Continued use of the serum and cream set leaves my skin feeling very balanced, with the right amount of hydration and is plump and firm, fine lines are softened around the eyes. All the dullness, dryness and pesky dry patches on the side of the face that seems to never go away in the winter month have all disappeared. (hello my new glowy winter skin!)

Note: make sure you use a water-based primer with the face cream during the day as it causes the product to ball up with dimethicone based primers.

I also noticed that it also helps with healing – I applied the serum on a bad blister burn on my arm and it accelerated the healing process and helped to minimised the scarring which is slowly fading after 2 months. 

With this skincare set, I had to unlearn my years of needing to layer products as my skin is happy with the serum or face cream on its own and estatic when they are used together. And there is literally no need for any other creams or serums at all (other than sunscreen during the day) as it just delivers all the right properties we all look for in the pursuit for youthful skin – hydration, plumping, smoothness, firmness and improved clarity.

I really want to say my experience was psychological and imaginary else because I was secretly hoping the product won't deliver and I don’t develop a need for it. Alas, it has surpassed my expectations and works astonishingly well - too well in fact that I'm very attached to it and think my skin now depends on it to look its best. But with its price, I’m very torn - it is hideously expensive and costs what most would have to pay for a month’s worth of mortgage interest and will last only 4-5 months (6 if you are stretching out its use like me). Sigh, if only I have won last week's lottery.

If you can afford the splurge and indulgence (lets be honest, not many of us can), you skin will never look any better. Otherwise just live in ignorant bliss and look for multiple products that could give similar effects for a less and without the guilt.

RRP A$1,350 | US$950 for the Face cream and serum set at selected Estee Lauder counters and online. If you are travelling to the US, definitely look it up there.
This featured product was provided for consideration.

Wednesday, July 18, 2012

Shrink and Sculpt Your Butt with Tripollar POSE

A couple of weeks ago, I blogged about Tripollar STOP, a break-through radio frequency (RF) technology at-home device for the face and neck. Today I’ll continue with my review on its heavy-weight sister, the POSE device.

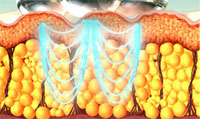
As a quick recap, Tripollar is an advance Radio Frequency (RF) technology that can penetrates to the dermis and hypodermis layer of skin where fat cell reside to heat and force the fat cells to release their liquid, causing them to shrink and contract and also stimulate dermal activity to encourage collagen production.
Tripollar POSE heat penetrating to the fatty layers of skin

Tripollar POSE:

The POSE unit is a skin tightening device made especially for the body. Physically, it is the same shape as the STOP device but larger, with a wider base and the electrode tips are bigger, each about as size and shape of a metal marble.  It has a higher output power 2.5v vs 1.5v and and it has different preset parameters (as it doesn’t state it, I can only make conjectures here based on information on the manual) designed to penetrate into the fat layer to stimulate the cells to release the fat and and improve overall skin laxity.
 
The POSE device promises to:
  • tighten slack skin (goodbye flabby upper arms
  • contour the body (svelte waist, here I come) 
  • reduce the appearance of cellulite and stretchmarks (yes, please!) 
  • break down body fat stomach and thighs (that would be a miracle!) 
  • provide immediate and lasting results (that was my final tipping point in getting the unit)
I will include only 2 of the clinical before or after photos in this post as I feel the angle of these photos and the lighting conditions in the before and after shot were similar enough to give more accurate comparison of the differences. If you are curious for more visuals on dramatic difference, head over to see them here and Google will be your best friend as well. 


Operating the Unit

The power settings on the POSE device is on the unit instead of the power supply like the STOP unit. Once turned on, pressing the power switch will repetitively toggle from Low, Med to High.

To turn to unit on or off, just press and hold the Power button on the unit for 3 seconds. Again for use, you apply the preparation gel (this is the same gel as the STOP unit but instead of being in a jar, it’s in an easier to dispense tube) to allow for effective conducting of the RF technology into the body.

Tip: when you need to buy the refill, get the POSE preparation gel, even if you only own the STOP device as it works out cheaper per unit. 

The usage direction is very similar to the STOP but if you ever feel confused, there is even the instructional video to watch.

I begin my treatment session by concentrating on my problem zones - the butt and thighs (stretchmarks and slight dimpling which is possibly the early signs of the dreaded cellulite), calves of legs, the left waist and upper arms where skin is a bit laxed and could do with some tightening.

The recommended treatment procedure
click to enlarge: the recommended treatment time for different body zones
Some notes from my experience with the device:
  • I always use the device on High setting since the problem areas like the butt and legs has more fatty tissues and tolerate higher power from the start. Try the medium on the arm area if you feel the heat gets too intense. I generally don’t find much use for the low setting.
  • It’s quite awkward to sit semi-naked and covered with tacky gel across various parts of your body during treatment. I usually lie on the coach covered with a large towel so that the mess doesn’t go anywhere. On warm days, it’s fine but in winter, the feeling is not as pleasant. Good thing the device emits a warm sensation and heats up the area being treated but a heater wouldn't go amiss as well.
  • As instructed by the manual, I try to ensure the four electrode tips touch the skin to get even and optimal power and heat penetration into skin and generally have no issues but on tricky contours such as back of legs, it can be hard to tell if all four electrodes are in proper contact. When in proper contact, you will feel the warming sensation of the electrodes on your skin.
  • I work the device over a particular area of my body the size of my palm at a given time until it’s warmed up and the amber light on the body of the device shows up, indicating the skin area has reached optimal temperature. Given there is a larger surface area and skin is thicker in the body, this takes considerably more time. I stay on the area once its heated to the optimal temperature for another 10 seconds in the area before moving to the next section. 
  • Like the STOP device, the lights amber light on POSE can be fiddly – it would take ages for it to turn on, especially when on high setting. On low setting (it must have a lower temperature threshold), the amber light turns on more readily and within a short period of time on a section of skin. 
  • The bigger electrode tips  makes a difference in helping to get the job done a bit quicker but is still too small in my opinion to cover a bigger area. It takes me over 40 minutes just to do each side for butt and thighs area. In total it usually takes me over 100 minutes to do my butt, thighs and calves, time I don’t really have to spare.
Using POSE on my thighs

Results and Verdict:   
Reduced circumference sizes and toned skin 
On my thighs and calf, I definitely feel and see that the skin has tightened. I measured the circumference of my thighs before and after 1 session and I had about 07mm shrinkage in the circumference of my thighs! On my calves, I noticed about a 4-5mm reduction in circumference.

Not each session yielded this dramatic same result though. Subsequent results only gave reduction of 1-2mm that was very hard to measure but the legs definitely look more toned and sculpt after each use. It might not sound much and doesn't warrant a photo (because it won't show up) but every bit counts and its entirely due to the use of the product, not weight change or excercise.

Tip: If you are suffering from a double chin, try using this device  to help break down the stubborn fat in that area. 

Tighter and Smoother Skin 
When I do the pinch test on my skin on my legs, it looks and feel smoother in texture with less unevenness or dimpling effects. After 8 sessions, the improvements are plateauing but my skin is visibly more even than before I started the treatment.

Thankfully the dimpling look on the back of my legs were very minor to start off with, and with the use of this device, there really isn’t any sign of cellulite visible.

Lifted and Toned Contours
This is my favourite result. I couldn't measure myself to give definitively but for at least a week after each session, my butt definitely looks lifted and not so saggy or sad, which is always a welcomed outcome, making that almost 2 hour treatment session more palatable (I'm afraid you won't be seeing any butt pictures from me, people from work read this blog and I need to preserve some modesty!).

When pinching the area in arms where skin was beginning to become a bit loose, it felt tighter with less give and laxity. In fact I would say it is more taut and toned so that my upper arms doesn't wobble like a jello when I tap against it.

Stretchmark Improvements
The stretchmarks are definitely smoother against the rest of the skin, with the lines no longer as pitted. In terms of colour changes, my old silvery lines is slightly (it’s hard to be conclusive with such small changes) fainter in colour, blending better against the rest of skin, making them slightly less obvious (but it could be that optical illusions are at work with the smoother skin casting less shadows).
stretchmark improvements - lighting make its more dramatically improved than in real life

So although POSE can’t get rid of the appearance of stretchmarks, it definitely seems to iron them out and gives smoother looking skin on the affected areas.

Last Words:
Having been using this device for 8 sessions now, the results area nothing short of incredible on my skin. I’ve never had a topical product give so much visible difference so quickly. My only issue is the time commitment required each session on my body parts.

I wish I had the luxury of doing 2 session a week for 6 -8 weeks (treatment phase) and then twice a month (maintenance phase) as per the usage guideline but for time-poor me, it is not achievable. In the 4 months I’ve owned the device, I’ve only racked up 8 sessions and sometimes a month would lapse before next use; it feels like I’m starting off from the first session again at times especially now that winter has set and I’ve gained some weight.

If you can stay committed and want to have your body trouble spots tightened, toned and smoothed out, then POSE is the right device for you (unless you have these contra-indications).

I’m glad I own this device so that when I can have the time, it is at my disposal to put it to use. In fact, writing this review has given me renewed motivation to try and get a session in every 2-3 weeks.

What body parts you want to have zapped and shrinked? 
Did you read my STOP review - that's pretty amazing too!

Tripollar POSE RRP A$499.99 online and selected Myer stores. 

Tuesday, June 26, 2012

Reviewed & Loved: Tripollar STOP

I love my gadgets but by far my favourite techy toys would have to be beauty gadgets. I love the idea of innovative technology used in the beauty industry to deliver more positive and lasting results than traditional topical lotions and serums.

And I’ve been keeping a watchful eye of all the advancement in non-invasive medical treatments of– from IPL and fractional lasers (Fraxel) for skin resurfacing & rejuvenation, LED light for skin rejuvenation to skin contouring with radio frequency (Thermage) for skin contouring- all these new technologies providing the beauty world results that would never in a hundred years be achieved from using any cream or serum in a jar.

With this development in the professional market, it has spawned a myriad of similar functioning devices for the at-home market. These are generally lower-powered (for safety reasons for the average untrained user) versions of the stronger professional machines in medical clinics and spas and promises to give similar results over a longer time period with a lower cost and has very little, if any, down time.

Last year, a new generation radio frequency based at-home device was launched into the Australian market. It has been sold in the European markets since 2009 and when it is finally available in Australia, my curiosity was piqued.

After doing some research on the technology and product, seeing pictures of the benefits treatments, I decided I must try it too.

Finally after 4 months of lusting and more readings on the technology and user reviews, I took the plunged and bought the products. Yep, I bought both the STOP and the POSE device in one hit!

Some Background Info
The technology behind the STOP and POSE devices is Tripollar radio frequency (RF), developed by Pollogen (a big name Israeli medical aesthetics company) and has multi-nation patents pending for this at-home device. TriPollar is a non-invasive, pain-free treatment good on all skin types to achieve body contouring, cellulite reduction and an improvement in skin laxity.

Unlike traditional mono-pollar or bi-polar RF, Tripollar RF combines both mono and bi-polar frequency to deliver RF energy where it’s need with less power output and hence less discomfort for the user and is a proven technology for skin tissue tightening and cellulite reduction benefits.

For more information on Tripollar and radio frequency technology please visit here

Ok -Tripollar technology. So What?
I’m not one to be easily impressed, but looking at the before and after photos on the company site and on forums and learning how Tripollar is used to deliver optimal radio-frequency (RF) energy to the dermis and fat layer of the skin (2mm deep) to heat the skin’s fiboblast and thereby can shrink fat cell in and stimulating dermal activity to encourage collagen production, I was very much sold.
After 6 Stop treatments for an EDS forum user
And if that isn't enough and you want some clinical studies then head over here and  here to read the review and results of Tripollar treatment. Although the second listed study not independent and based on the professional Tripollar treatment, they are still very impressive and convincing.

The STOP and POSE devices

Both these devices are powered by the impressive Tripollar technology but are of different power ratings and designed to used on different body parts.

The units are not only different in size, but the energy outputs are different (STOP is output of 1.5A and POSE is 2.5A).

The STOP device is designed for the face, the back of hand and neck whilst the POSE device is designed for trouble spots in your body like your stomach, thighs, arms etc.

Today, we'll take a closer look the STOP device.

Tripollar STOP
This little hand held device comes in a beautiful box, looks sleek and is well made. The device comes in three colours, black, red and white. I ended up ordering the black unit because the red unit I wanted was out-of-stock.
Inside the box, there is a jar of preparation gel to use during the treatment, an after treatment moisturiser, the unit itself, a power supply, instruction manual and DVD and international warranty card.

My unit is glossy black with gold trim at the base and comes capped to protect the work component of the device. It is an elongated hexagonal shaped device and surprising is very comfortable to hold in the hand during use.
On off switch and power adaptor input; Stop electrodes
How does STOP work?
At the base of the power supply there is the intensity setting that delivers low, medium or high output voltages (7V, 8V,9V). When plugged in, a green light indicates the power setting selected and the sliding switch on the side allows for setting controls.
Underneath the cap of the STOP device is 4 metal electrode balls that will be in contact with skin during treatment.

There is also a temperature sensor in the middle to measure skin temperature during use and will cut-off if it detects overheating of the skin ensuring that you can never injure yourself with this device and the green light will go off during use when this happens.

How to use STOP
For the RF energy to be properly conducted into the skin, the preparation gel is needed. You smear a very thin layer all over the area to be treated prior to use. As it is very thick, it feels much like ultra sound gel and is quite gooey in feeling. Thankfully it is pleasant in smell.

I turn on the device and I start off with the low setting during first use to get my skin used to the heat. Nowadays, I go straight to the high setting.

The green light on the STOP machine indicate it’s on. I then press the electrodes onto my skin, making sure that all four nodes are in contact with skin for the RF to do its job.
The instruction manual and video advises that you need to do a warming up stage to warm skin to the right temperature followed by a maintenance stage by going over the area again in upward lifting motion to finish off. The advertorial instructional video can be viewed below.

I take a slightly different approach - I complete the entire process for my one side of the face first before moving to the other side.

Starting at under the eye area, I move in small circular motion to warm up the face until there is the amber light shows up to indicate the skin has reached its optimal temperature (40 degree c). I would stay on the area for another 5 sec before moving to the next area.

After 5 minutes minutes I’m done and move to maintenance mode and do larger sweeping motion on the side of the face for another 5 minutes. So in total it takes me 20 minutes to do my entire face. I haven’t tried this on my neck yet but this would obviously lengthen treatment time more.

My Experience 
  • I found the heat very comfortable, it wasn’t too hot and during the cooler month, a very welcoming sensation.
  • There is a intense heat sensation when you overstay in an area of your skin, especially if you have the device on higher setting. It doesn’t cause any burning but it’s momentarily painful until you move the electrodes to another area of the skin and that area cools down. Thankfully you do not suffer any burns from this.
  • The lighting system was very weird for me, sometimes it takes a while to turn amber while other times it turns amber immediately, I think it has to do with the ambient temperature in the room, and heat dissipating from the surrounding treated area, so when you move to the next spot, it heats up faster. I also found it annoying to always having to look into a mirror to be able to see the amber light. After a few uses, I just learnt by feeling of the heat on my skin before moving to the next section.
  • The gel definitely made the gliding of the STOP electrode more smooth and pleasant even if it feels slightly icky when initially applied. It also wipes off easily without leaving any residue or stickiness which is very handy. 
  • I used the after treatment moisturiser and found it to be very rich (although thankfully not greasy in feeling). I’m not sure I like the richness after my skin is all heated up.
  • Afterwards my skin looks flushed like I’ve just gotten out of a very hot shower. It looks plumped up but it also looks like it could be due to a slight swelling effect as well. 
  • It works a treat on removing my under-eye bags. The dark circles are still there but you can see that my eyes are less puffy. It also helps to get rid of the crepey look in that delicate skin area The lines look the same until the next day. I can see the expression lines under my right eye is that little bit shallower compared to the day before. Even when I smile, the crinkles are less deeper. This effect lasts about 3 days before the lines creeps back again, albeit shallower.
  • Helps with zapping minor hormonal zits as the heat seems to do a great job of killing the bacteria on skin. 
  • I do notice immediate lifting and tightening effect. When done on one side of my face, I can see a difference – it looks more lifted and sculpted. I tried capturing it in photo but the effects aren’t as sensational as it is in real life in the photos below. You will see there is slight redness and swelling on left face of the before pic as I have only used on one face so far. In the after pic, 20 minutes after treatment and washing off the gel, my face is no longer red, and it appears more sculpt and the skin feels taut.
  • Having used the device for 4 months now (about 9 treatments so far because I find it had to find time to consistently sit down for a session in the past few months. Nor have I been following the manual's advice of  2 treatments a week for 6 weeks and then once a fortnight maintenance regime due to a irregular evening schedule) 
  • But STOP gives your face the fresh and healthy look. It seems to improve skin clarity and give the impression that I’ve had plentiful and restful sleep even when I haven’t. 
  • My skin is ultra soft and smooth the next day after using STOP and stays that way for 3 days before the glow and clarity fades and is akin to applying my ultimate serum and moisturiser combo (more on that in another post) 
  • My skin also feels very taut. I can pinch and pull it and it feels like the skin elasticity is given plenty of resistance and springs back immediately. 
  • The skin also feels thicker – I feel like I have skin back in my early 20s again where it was bouncy and with consistent use, my lines haven’t disappeared but they are less prominent. 
Notice the bags under the eyes have improved and the face looks more lifted and sculpt on the left side
The verdict:
I’m enamoured with the results that I get from STOP. The expression lines are not fading fast enough for my liking but I can’t complain as I have few lines to begin with and they are definitely softening.

My biggest love is the taut bouncy skin I get that lasts for over a week with the use of this device. I’ve never had a topical product ever give me skin with so much elasticity and At hefty price of almost A$400 STOP is not cheap but it is cheaper than paying for a professional session of RF treatment.

You need to be committed to find the time to use this product regularly for it to give you results. If you are prepared to put in that effort, the rewards are worth your while. Otherwise you will just have another expensive gadget sitting in your cupboard.

For me, this device is a keeper and worth its price and more for the skin sculpting effects and reduced fine lines. I can achieve all that in the comfort and convenience of home.

You can now read my review of the POSE body contouring device here.

Tripollar STOP - RRP A$399.99 online or at selected Myer stores.

Tuesday, January 24, 2012

Aum Organics for Gentle Effective Results

It’s often said that no one beats mother nature at her own game of producing the best products so in today’s skincare series, we go back to nature.

Aum Anti-age Organics
Aum is a brand I’ve only recently been acquainted to but I’m glad I was introduced to it. It is one of the few Australian brands that is entirely organic and nature based and has received certification from EcoCert for its entire product range.

The most exciting release from Aum was its new line of anti-aging product launched last September.
The line comes with 4 products – a daily facial cleanser, a firming eye cream, a  brightening face balm and a line minimising cream, all of which has been scented with a warm earthy ylang ylang and sandalwood oil.

The star ingredient of this new line is marine complex from seaweed which contains an active called Fucoidans. The process of bio-fermenting the marine complex enriches it with antioxidants and vitamins with the resulting brew full of boosted actives that help inhibit and slow down the skin’s degrading process by preventing the break down of elastin and hylaouric acid while promoting the production of collagen.

Gentle Facial Foam Cleanser - 125ml RRP A$19.95
  • Not so foamy, I class this watery gel cleanser in the low foaming category. It is indeed gentle on skin and doesn’t strip off moisture from the wash or leave a tight feeling afterwards. 
  • Contains aloe juice with papaya and pomegranate extract to help keep skin smooth and soft.
  • The only thing I didn’t like about this product was that I found the scent of ylang ylang / sandalwood a bit overbearing (I'm more a floral scent girl), especially in the morning. Thankfully, the scent rinses off straight away.  Other than that, I like the gel texture and see this cleanser being suitable for all skin types, but those with dryer skin benefiting most from the hydrating formula

Firming Eye Cream - 15ml RRP A$26.95
  • This has to be my favourite product from the range. 
  • It is light cream in a dropper bottle that quickly absorbs into the skin on the eye area and you can feel it working away with a tightening effect felt straight afterwards without being too greasy but still emollient enough to moisturise.
  • The scent again was quite strong but surprisingly, after a few days use, I got used to it and hardly notice it unless I’m focusing on it.  The other good news about the overpowering scent is that it does fade off over 20 minutes time.
  • After 2 weeks use, I start to see that skin is firmer and more taut, fine lines are lighter and less pronounced. I can only conclude that the extracts from okra which are meant to act as a natural botox by inhibiting the muscle contraction is really working! The only results that is missing is the brightness factor (which is made up by the brightening face balm below) and the rate of improvement is not as dramatic over a space of 2-3 weeks but if you persist with using the eye cream, you will get results in the longer run.

Brightening Face Balm - 50ml RRP A$24.95
  • Another favourite of mine, this light emollient cream instantly re-hydrates and smooth skin without stickiness or greasiness. 
  • The vitamin c from Acerola cherry is added to brighten skin, fight pigmentation and act as a natural sun protectant (vitamin c gives SPF 2 protection) whilst ginseng is included to help boost blood circulation to give an even complexion.
  • Again it was only after 2 weeks use that I saw some visible results of overall improvement to skintone and new blemish scars fading faster than usual. I think this is a great maintenance product to use (especially if you are trying to stretch out the use of other more expensive treatment products) as you get a glow in skin after 3-4 weeks use and long term use will see the vitamin c help skin slowly repairs any existing pigmentation damage.

Line Minimising Cream - 30ml RRP A$29.95
  • The cream also contain matki, a super lentil full of antioxidants and vitamins to boost skin renewal and has similar effects to retinol without the associated irritations.
  • When applied first on skin without any other product, this non-greasy cream gave me a skin tightening sensation. Others may like that feeling but I found it  uncomfortable and so always layer this on top of the brightening balm to eliminate that tight feeling. 
  • After10 days use, skin is supple, yet firm and I found it really did help in maintaining good skin elasticity over time. Expression lines were minimised as skin’s hydration level increased so that skin appeared plump and younger looking.

Overall, I’m very pleased with the results from Aum. They do take a bit longer to give results but you can be assured that products contain no synthetic chemicals and not only natural based but are of organic origins where possible. If you are making the conscious decision to choose natural and still want visible improvements to skin tones and  texture as well as fine lines, then there is no more affordable choice than Aum.

Available at selected Myer department stores and organic health retailers. For  stockist information visit Aum Beauty online.
This range of products was provided for consideration.