So in trying to get into the spirit of it, I have been having copious amounts of easter eggs (Cadbury Creme eggs are to-die-for!) and have even recruited my nails to partake in the festivities.
Sally Hansen have launched some very cute Easter inspired designs this year in their Salon Effects range and I had some sent to me the other week.
Sally Hansen Salon Effects Easter Edition - RRP A$14.95
The five designs are:
Checker Out - A light green gingham print
All a Flutter - pastel coloured butterflies on a white background
Mad for Plaid - checkered strips of pastels and brights.
Not a Peep - colourful little tiny chicks.
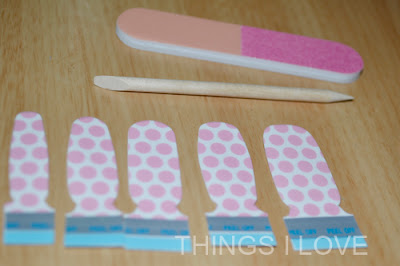
Pink-a-dot - Pastel pink on white dolka dots.
I decided that I wanted Pink-a-dot on my nails because they remind me of the wrappers of the chocolate Easter eggs that I've been devouring!
These nail strips are easy enough to apply and because my nails are not that long, I was even able to cut each nail foil in half to use on 2 fingers meaning I will be able to get 2 uses out of a pack – BONUS!
So the tips to applying Salon Effects are:
- Match your nail size with the nail strips first and line them all up on the table in the order of your fingers so you won’t get confused when it comes time to put them on.
- Prep your nail by pushing but the cuticles and lightly buffing the surface of your nails before application to create a non-smooth surface for the nail strips to adhere to.
- Start with the pinky finger and work your way to applying the nail strip to your thumb. I work on the same digit on alternating hands but you can work with one hand first before doing the other – do what feels most comfortable for you.
- Peel of the backing and position onto nail, aligning the edges on both side of the nail. Then press down very hard during application of the nail strip to help create a strong bond with the nail polish strip and your nail bed. The flat side of the orange stick is perfect for this.
- Any excess of the strip should be folded over nail the nail edge first to create a crease line before using the included nail file to file it off – ALWAYS file in one direction only to avoid ragged edges of the nail.
- Finish off with a top coat layer to protect the design from scratches and to give nails a high gloss shine! Every few days you can apply the top coat again to refresh the nail colour and keep it looking glossy.
 |
| lining up the nails shape helps with getting them ready for application |
It took me over 30 minutes to do both hands but I’m sure as I improve my application skills, I’d be much faster. I’ve had the manicurist applies these on me in under 15 minutes!
Available now at Priceline and selected pharmacies.
This featured product was provided for consideration.


Pretty! I like that these are Easter-like but could be worn in other times,too. That way if you stock up you don't have to rush and wear them :D
ReplyDeleteSo cute... I love the idea of putting design on my nail. I want to try...
ReplyDelete@Emma - That's what I like about this design too and it's actually very versatile :)
ReplyDelete@Fay - there are plenty of nail strip designs out there so definitely worth trying :)